facebook twitter instagram bloglovin
 photo toppost.png

Dec 31, 2020

Product Review // Firmoo Glasses

Have you ever heard of Firmoo?  They're a website that makes and sells prescription and non-prescription glasses and sunglasses.  They contacted me a few weeks ago asking if I'd review a pair of glasses for them and I thought, "sure, why not?"
So here's a video (my first vlog!) of my review, accompanied by some photos!
So, I'm really happy with my Firmoo glasses.  They are some of the best I've ever gotten from a website.  I love the style of them and they are really clear.  I've been wearing glasses since I was in 1st grade, and of course, I've gone through the "glasses are so geeky and I hate them!" stage of my life.  I mostly wear contacts now, but I love having a few pairs of fun glasses to change things up once in awhile.  Firmoo has tons of fun, funky, colorful frames in different shapes and sizes.  

The best part of Firmoo is that they offer a "First Pair Free" program.  You can go here to see the styles that you can choose from for your first pair (mine are among them).  You just pay the shipping on them.  

I know there are other companies that have started programs like this, but I can personally attest to the quality of glasses from Firmoo.  They're really great, and I've ordered prescription glasses online that have given me headaches or made me dizzy.  These are clear, well-balanced prescription lenses.  

So, if you're a glasses wearer (or if you're not and just want a pair of non-prescription glasses or sunglasses to complete your look), I highly recommend Firmoo!

Dec 29, 2020

NYC

Every year during the week between Christmas and New Years, my family tries to take a day trip to New York City.  Since we're only about two and a half hours from the city, day trips are easy.  And there's nothing like New York at Christmastime.  This year, we decided to walk across the Brooklyn Bridge.  We also spent some time around midtown, Central Park, Times Square, saw the Rockefeller tree (of course), and the Macy's windows.  The city is just so magical this time of year! 

Dec 27, 2020

Life Lately {According to Instagram}

Life has been so busy lately with getting ready for Christmas and the holidays, so here's a little peek at my life according to instagram lately!

(some notes:  a few of these shots are from Christmas Eve services at my church...we had over 6,000 people at 5 services and an entire "experience", including a live nativity (with real sheep!); that pink vinyl is Of Monsters and Men...coolest record ever; my new watch that I got for Christmas hasn't left my wrist!)

Dec 26, 2020

DIY Soy Candles

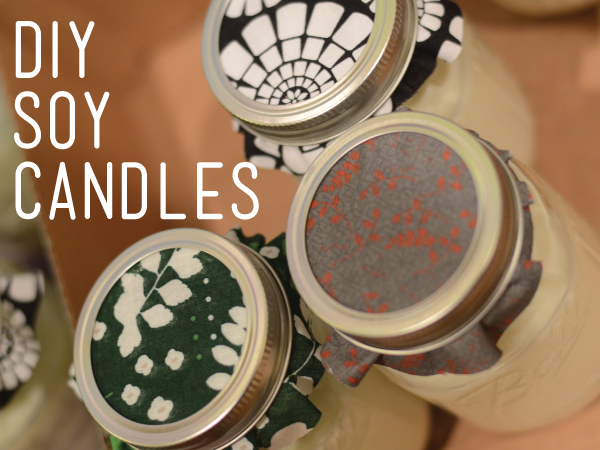
Every year for Christmas, I make something for all of my aunts (and now AJ's aunts, and my cousin's wife, and her mom...).  Homemade gifts are just special, and I love giving something that I've made.  Last year, I made everyone a set of coasters.
This year, I made candles.
Here's what you'll need:
Soy wax flakes (I got this 10-lb bag)
Scent (I used Hansel & Gretel's House from CandleScience)
Pre-tabbed wicks
A pouring pot (you can buy them at AC Moore)
Popsicle sticks
Mason Jars, votive holders, or other containers
A big soup pot for boiling water
Thermometer

All in all, it's pretty easy.
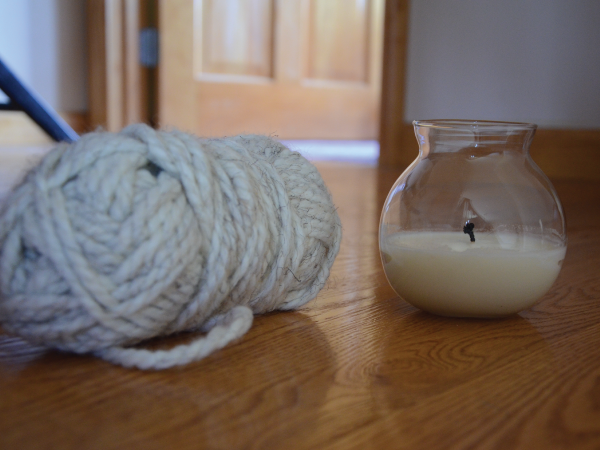
10 pounds of wax made me 15 candles in 16-oz. Mason jars.  I love the look of a mason jar, I use them all around my room and bathroom, so it was a natural choice.  But any glass container would work.
You want to put some wax into your pouring pot, and put that into a pot filled with water.  You're essentially creating a double-boiler.  Get the water hot (not quite boiling), and just stir your flakes as they melt.  Soy has a really low melting point, so it won't take long.  When your wax is at 160ºF (and completely see-through), add your scent.  I used about 2 tbsp for each pound of wax.  Stir that consistently for about 1 minute.  You'll notice that your scent bottle will have a flash point on it.  That's the temperature you don't want to get near (mine was 210ºF).  If you keep your stove around medium (6-7 on a 1-10 heat scale), you'll be fine.
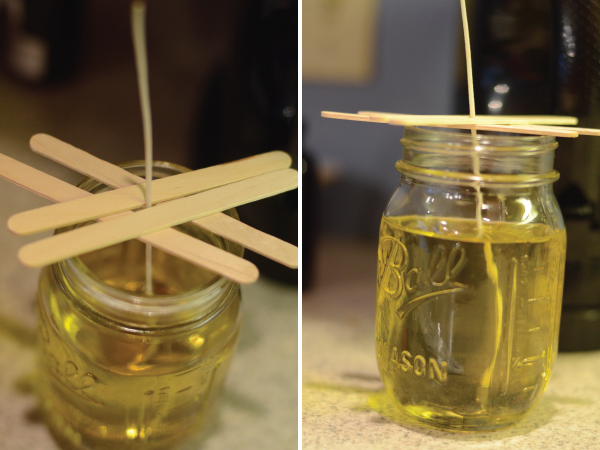
Once your scent is in, drop a little bit of wax onto a paper plate and let it cool.  As it starts to harden, touch it to see if it feels like a normal candle would.  If it's too dry, you need more scent.  If it's too oily, you need more wax.  Once you're happy, take a couple of mason jars and warm them up in the microwave or oven.  Then, hot glue a pre-tabbed wick into the bottom of the jar.  (I didn't do this with the first candle I made and I regretted it.)
Make a criss-cross around the wick with popsicle sticks (this will hold the wick straight up) and pour the hot wax into the jars.
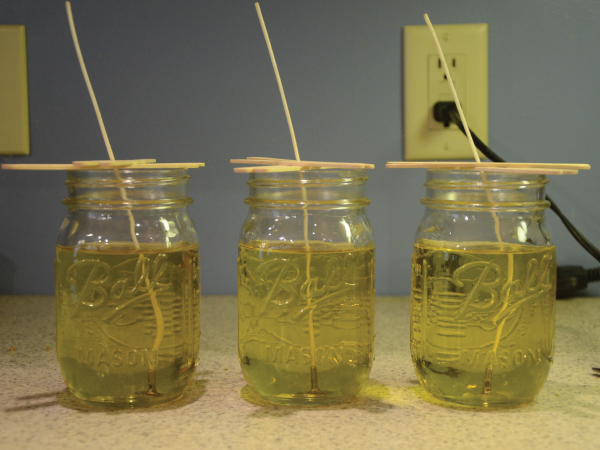
Then, set your jars aside and repeat the process until you've made all of your candles!  The wax will harden on it's own.  I put mine in the garage so they hardened a bit quicker. 
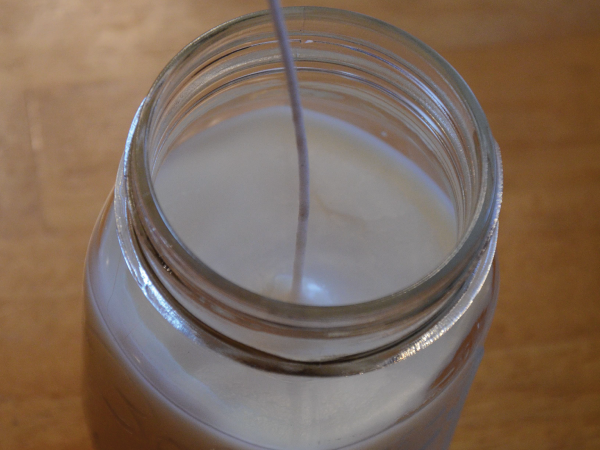
Once they're hard, trim your wick to about 1/4".  
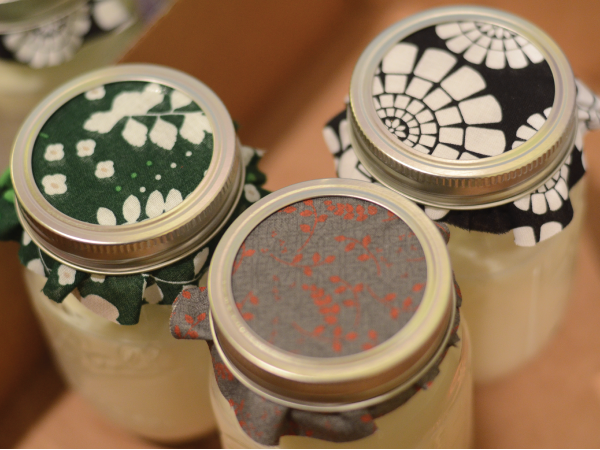
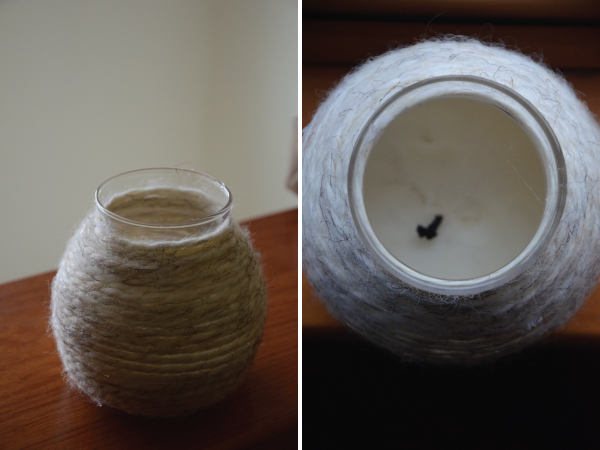
Then, use fabric or twine or yarn to adorn your candle.  Maybe make a yarn-wrapped candle out of it!

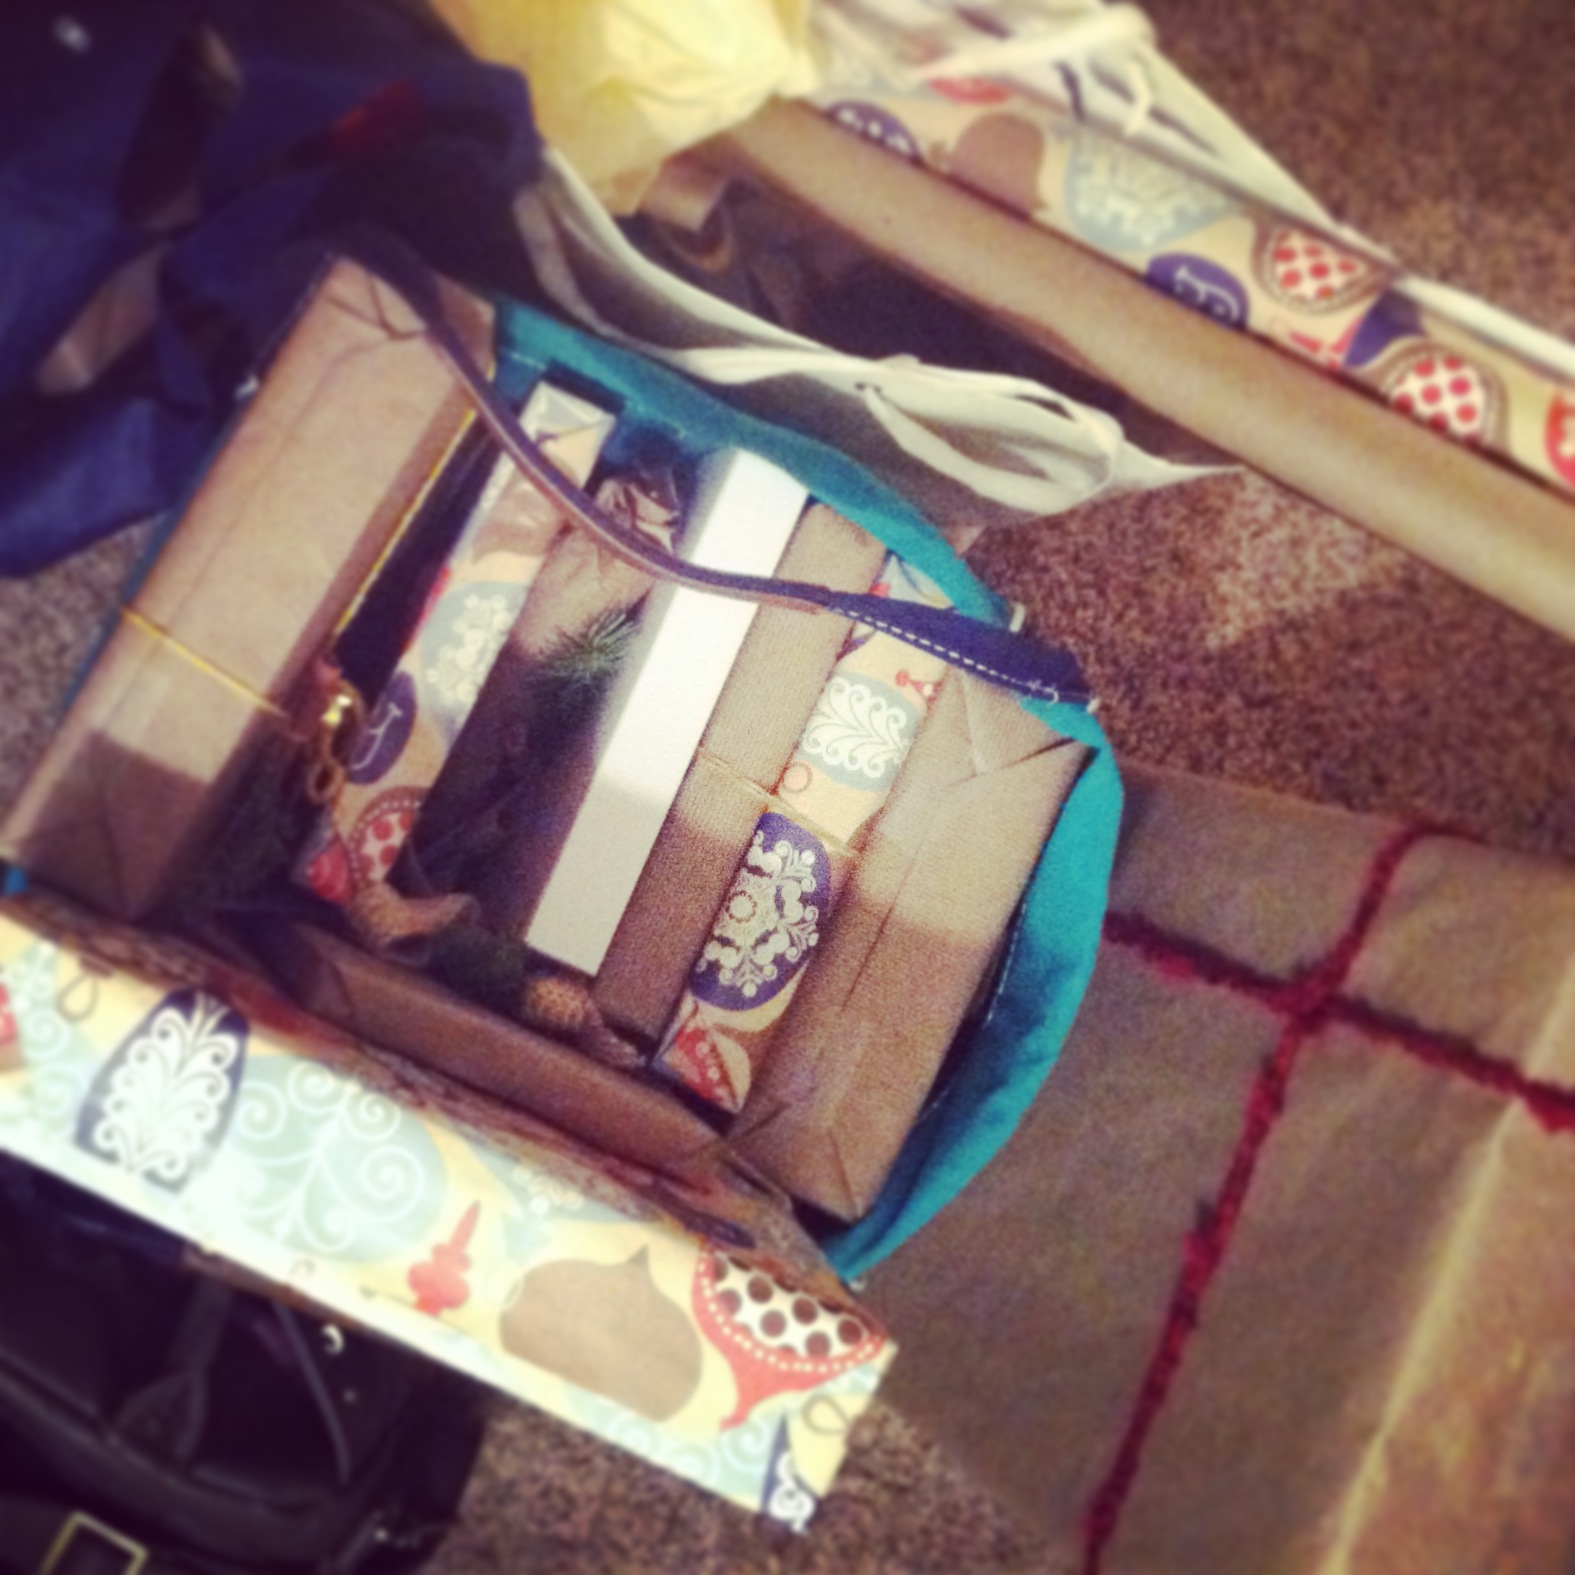
 I covered my lids in fabric and then put them into little paper bags and tied them up with yarn to give as gifts.
Everyone thought it was really special!
This is definitely one of the cheapest ways to buy candles.  All in all, it cost about $65 to make 15.  That's including the wax, mason jars, scent, wicks, bags, and fabric!  And that breaks down to $4.30 a candle.  And you made it.  So that, in itself, is impressive!

Dec 22, 2020

Yarn-Wrapped Candles

I'm in the midst of getting ready for the holidays, and I love giving handmade gifts. There's just something so special about giving (and getting) something that was made by you with a certain person in mind!

I was playing around with extra yarn and supplies that I had, and thought of an idea I saw a friend make last Christmas.  This is pretty much the easiest craft ever.
What you'll need:
Yarn (knitters & crocheters...this is a perfect craft for those half-skeins you have lying around after a project!)
A candle (I used one that I have been burning for the past week because I was experimenting.  I'd obviously recommend using a new candle if you were giving this as a gift)
Hot Glue Gun (Thank goodness for hot glue...it's magical.)

How you do it:
It's pretty simple.  Decide what you want wrapped in yarn.  I did the whole candle, but you could just do the bottom half or a strip around the middle...anything goes! Then, start putting a little line of hot glue and then wrapping the yarn, section by section, onto the candle.  You pretty much want all of your yarn to be hot glued, especially if your candle is round, like mine.  That way, the yarn won't try to slide up or down.  Put a 2-3in strip of glue, then push your yarn onto it.  Keep going til you go all the way around.  I'd recommend starting at the top and working your way down.
That's pretty much it.  
Literally.
Enjoy your candle!

Dec 21, 2020

Guest Post: Beth's Sock Wreath

hello ladies (and gents)! i'm elizabeth from until only love remains. i am so tickled & honored to be sharing with you one of my favorite DIY's this year on sweet betsy's blog! i hope that in the middle of all the holiday madness you can find some time to yourself & pour into those around you. maybe this sock wreath can be the perfect activity for some alone time or a great sisterhood gathering event! either way, enjoy!!
this is my first Christmas as a Mayberry and my first Christmas "on my own." my mom didn't pull out the boxes & boxes of decorations and make me help set up my home. she set up here home (and gave me some leftovers) but i was forced to begin the Mayberry Christmas collection. really, it is one of the most exciting things ever but Bruce and i have a small (small) Christmas budget especially because i want to put most of it into GIVING.
SOOOO... like most of us who are on a budget, i browsed though pinterest looking for some crafty crafts. this inspired me. so i made it. and i am sharing it with you!

ONE: gather Christmas socks. used or new it does not matter as long as they are clean! i got mine real cheap at walmart. 
TWO: buy a styrofoam wreath
THREE: cut an opening in the styrofoam
FOUR: turn the socks inside out and cut off the seam
FIVE: turn socks right side out again and slide onto the wreath
SIX: once all socks are scrunched on, hot glue the styrofoam shut
SEVEN: spread out scrunched socks so that they cover the entire wreath
EIGHT: make sure no styrofoam is showing and that the tops overlap all the bottoms
NINE: add a bow. make one yourself or buy it all the dollar store. i chose the later.
TEN: look how cute!
now your turn! if i can do it, you sure as heck can!
 ps: it only took me 20 minutes TOPS! #ilovefastcrafts
Related Posts Plugin for WordPress, Blogger...
 photo envye.jpg
envye blogger theme